Flow Builder
Flow Builder Screen
Simply click on "Flow Builder" on the left-hand control panel menu to start building an Automation Flow, and follow these easy steps:
Step 1: Create
Select the "Create New Flow" option, give your new Automation Flow a name, and click on "Create".
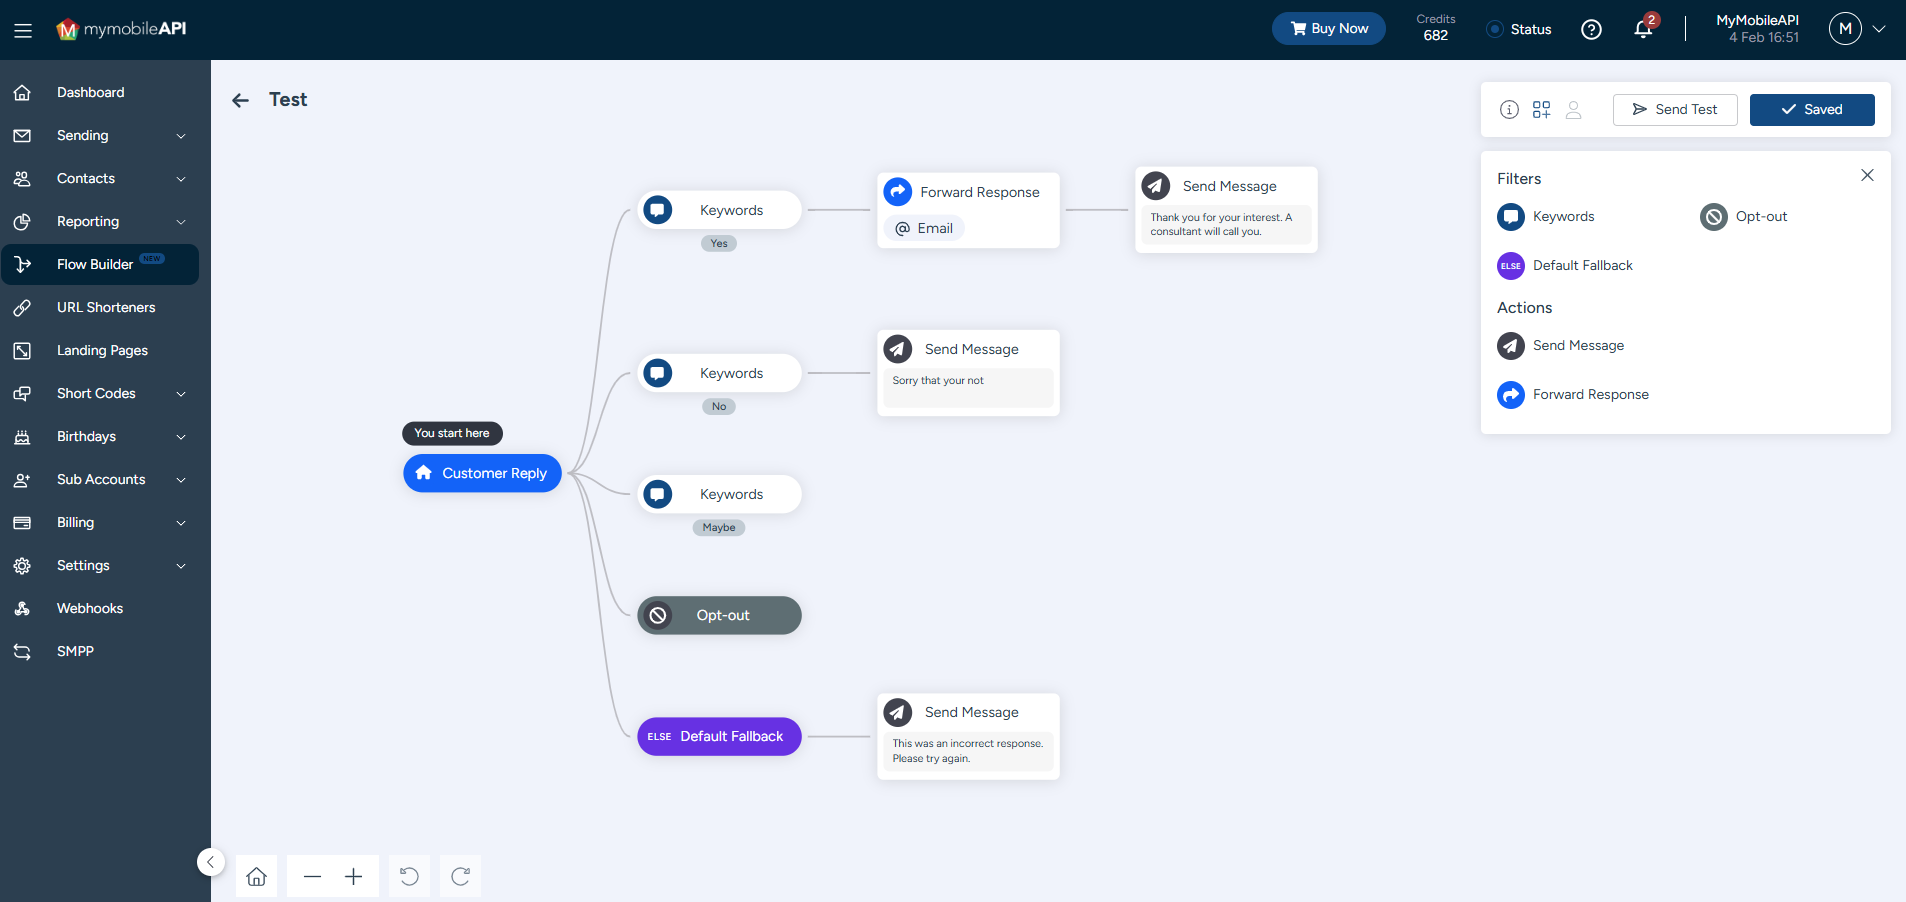
Step 2: Add Filters
Move your cursor over the "Customer Reply" button and click on the "+" sign to the right, and select your preferred filters.
Available filters:
- Keywords specifies which phrases (words) will trigger your flow, by adding unique keywords to the "Customer Reply" section.
- Opt-Outs specifies which phrases (words) will unsubscribe users from your account, when they respond with a specific phrase, by adding unique Opt-Out phrases to the "Customer Reply" section.
- Default Fallback triggers when a user responds with a phrase that is not recognized by any of your chosen keywords or Opt-Out phrases.
Step 3: Add Actions
Click on a specific filter to set the required actions.
Available actions:
- Send Message creates an automated response, which will send a unique message to a respondent, based on a specific phrase in one of your filters.
- Forward Response forwards customers' replies to a specific email address, based on a specific phrase in one of your filters.
Step 4: Save Flow
Click on the "Save Flow" button to the top-right of your screen to save your new Automation Flow.
Step 5: Send
Select your new Automation Flow from the "Automation Flow (Reply Rule)" drop-down table on your sending screen.
Assigning an Automation Flow as a default Reply Rule
When creating or editing an Automation Flow, you can choose which users and API keys will use this Automation Flow by default:
- Step 1: Once the Automation Flow has been created or you have selected to edit an Automation Flow, click on the settings icon in the top right-hand side menu bar.
- Step 2: Navigate to the drop-down menu labelled " Assign to", to select your preferred channels.
- Step 3: Select your desired Web User/s and API Keys that you would like to assign this Automation Flow to as the default reply rule. Once you are happy with your selection, save the changes by clicking on the "Assign Users" button.
Important Information
- Forward Response The 'Forward Response' action allows you to customize the email being forwarded. You can set a custom email subject and email body along with a selection of variables.
Available Variables
- From No = Mobile Number sending the Reply
- IncomingMsg = Reply Content
- IncomingDateTime = Timestamp of the reply
- SentMsg = Original SMS Content Sent
- SentDateTime = Timestamp of the Original SMS Sent)
- GRP Name = Group Name
- GRP Desc = Group Description
Updated over 1 year ago